
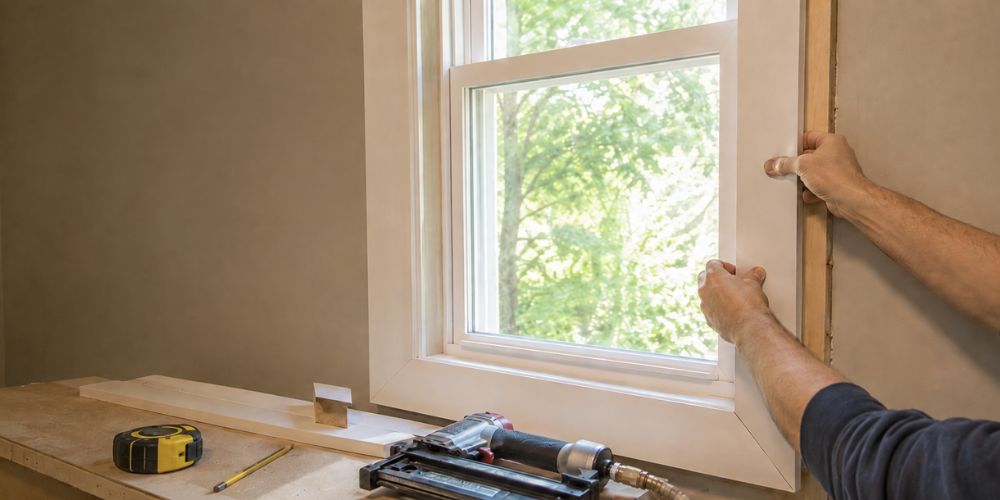
How to Install Window Trim for a Finished Look
Learn how to measure, cut, install, caulk, and paint interior window trim for a clean, professional-looking finish.
Window trim may seem like a small part of a home improvement project, but it has a big effect on the final appearance of a room. Well-installed trim covers rough edges around the window, hides small gaps, and gives the wall a clean, finished look.
Installing window trim is a project many homeowners can handle with basic carpentry tools. However, the quality of the finished result depends on accurate measurements, clean miter cuts, proper fastening, and careful caulking.
If you are not experienced using a miter saw or nail gun in Tallahassee, hiring a professional handyman in Tallahassee can help complete the job neatly and prevent costly material waste.
What Is Window Trim?
Window trim, also known as window casing, is the molding installed around a window to cover the gap between the window frame and the wall. Interior trim hides unfinished edges and gives the window a clean, finished appearance. Exterior trim adds visual appeal while helping protect the window opening from moisture and weather.
Exterior window trim does more than improve your home’s appearance. When installed correctly, it works with flashing, sealant, and siding to help direct water away from the window opening and protect the surrounding wall.
This guide focuses mainly on interior window trim. If you are installing exterior trim, check the flashing and drainage around the window before attaching any boards.
What to Know Before Installing Window Trim
A professional-looking result starts with proper preparation. Before cutting any trim boards, inspect the window opening and make sure the surface is clean, dry, and ready for installation.
Check the Window Opening
Start by removing the old casing, nails, loose caulk, and debris around the window. Use a pry bar and hammer carefully so you do not damage the surrounding drywall.
Next, check that the window frame is level, plumb, and square. Walls and window openings in older homes may be slightly uneven, so measure each side separately instead of assuming both sides are identical.
If the window is loose, damaged, or allowing water inside, repair the problem before installing new trim.
Mark the Reveal Lines
A reveal is the narrow section of the window jamb that remains visible between the window frame and the trim. It creates a consistent border around the window.
A reveal of approximately 3/16 inch is commonly used, although some homeowners prefer 1/8 inch or 1/4 inch depending on the trim style. Use a pencil, square, and straightedge to mark the reveal around the opening.
The reveal line gives you a visual guide when installing the casing. It also helps make the trim look even, even if the wall or window frame has slight imperfections.
Seal Gaps Before Installing Trim
Do not use window trim to cover gaps between the window frame and the rough opening. Even small openings can let in drafts, dust, insects, and moisture.
For suitable gaps, apply a low-expansion foam designed for windows and doors. Let it cure fully, then carefully cut away the excess with a utility knife. Clean the window frame and surrounding area before installing the casing.
Sealing gaps around windows can improve indoor comfort and help reduce unwanted air leakage.
Consider the Wall Thickness
The thickness of your wall affects the size of the trim boards you’ll need. A typical 2×4 wall has a shallower jamb than a 2×6 wall, so the same trim dimensions may not work for both.
Measure from the window frame to the finished face of the drywall. Use this measurement to select the proper width for the sill, jamb extensions, and casing. Taking this step before buying materials helps ensure the trim sits flush and fits the opening properly.
Start With the Largest Window
If you are installing trim around several windows, begin with the largest one. Larger windows require longer boards, so starting there gives you a better chance of using leftover pieces on smaller windows.
Before you begin, purchase a little extra trim. Mistakes happen, and one inaccurate cut can waste an entire board and delay the project.
Tools and Materials You’ll Need
Full Setup for a Professional Finish
For several windows or a larger project, you may need:
- Tape measure
- Pencil
- Speed square or rafter square
- Level
- Miter saw
- Brad nailer or finish nailer
- Brad nails or finish nails
- Wood glue
- Paintable caulk
- Wood putty
- Sandpaper
- Primer
- Paint
- Utility knife
- Pry bar
- Safety glasses
- Hearing protection
Choose nails that match the thickness of the trim and the surface behind it. Make sure the nails are long enough to pass through the trim and grip solid framing or another secure support. Drywall alone may not provide enough strength to hold heavier trim in place.
Simple Tool Setup for a Single Window
For one window, you can work with a smaller setup:
- Tape measure
- Pencil and square
- Miter box
- Hand saw
- Finish hammer
- Nail set
- Wood glue
- Paintable caulk
- Wood putty
- Sandpaper
A miter saw makes the job faster, but a miter box can produce good results when used carefully.
Choosing the Right Trim Material
Pre-primed wood trim is a practical choice for painted projects because it requires less preparation. Finger-jointed trim is also a reliable option for interior applications.
If you want a natural wood finish, choose stain-grade boards with an even grain. Avoid pieces that are warped, cracked, or badly bowed, as they can be difficult to install and finish.
For exterior projects, always choose materials designed to withstand outdoor conditions. Exterior-grade wood, composite, PVC, and treated trim are better choices than untreated interior molding.
Step-by-Step: How to Install Window Trim
The most common installation sequence is top, sides, and bottom. If your design includes a separate sill or stool, install that piece first.
Step 1: Remove the Old Trim
If you are replacing old casing, run a utility knife along the paint or caulk line where the trim meets the wall. This helps prevent the drywall from tearing during removal.
Use a pry bar to loosen the trim slowly, then remove leftover nails and scrape away old adhesive or caulk. Once the area is clean, inspect the wall and window frame for cracks, rot, or other damage before installing the new trim.
Step 2: Measure the Window
Measure the top, bottom, left, and right sides of the window, and record each measurement separately. Use your reveal lines as a guide, since they provide a more accurate reference when the walls or window frame are slightly uneven.
If you are adding a projecting sill, measure the distance from the window frame to the face of the drywall. Then, include the amount of overhang you want on both sides.
Avoid cutting all the boards at once. Measure, cut, and test-fit each piece individually to ensure a precise fit.
Step 3: Cut the Top Trim Board
Begin with the top trim board and cut one end at a 45-degree angle. Position it along the reveal line, then mark and cut the opposite end to create the second miter.
Before fastening the board, hold it in place and check how both angled ends meet the side pieces. If you notice a small gap, make slight adjustments and test the fit again. Window openings and walls are not always perfectly square, so the final angle may require a minor adjustment rather than an exact 45-degree cut.
Step 4: Install the Top Trim
Apply a thin layer of wood glue to the mitered corners, then position the top board along the reveal line. Use a level to make sure it is straight before securing it.
Fasten the trim to the jamb and solid wall framing, keeping the nails away from the ends to prevent the board from splitting. Space the fasteners evenly and set them slightly below the surface so the nail holes can be filled later.
Step 5: Cut the Side Trim
Cut one end of the first side board to match the mitered corner of the top trim. Hold the board in place, mark the bottom cut, and then make the cut.
Test-fit the board before securing it. Take your time and make small adjustments if needed—it is much easier to remove a little more material than to fix a board that has been cut too short.
Repeat the same process on the opposite side. Even if both sides appear identical, measure each one separately because window openings can vary slightly.
Step 6: Install the Side Pieces
Apply a small amount of wood glue to the upper miter joint, then position the side board along the reveal line. Use a level to make sure it is straight before securing it.
Fasten the board to the jamb and wall framing, keeping the top corner tight as you work. Repeat the same steps on the opposite side. If the trim moves while you are nailing, the miter joint may open and leave a visible gap.
Step 7: Cut and Install the Bottom Trim
The bottom trim board usually has two mitered ends, so begin by cutting one end and test-fitting it against the side trim.
Once the first joint fits properly, mark and cut the opposite end. Place the entire board in position to check both corners before applying any glue.
When both joints are tight, apply a small amount of wood glue and secure the bottom trim.
If your window has a separate sill or stool, the bottom casing may be installed differently. In that design, the side pieces usually rest on the sill instead of forming a complete four-sided mitered frame.
Step 8: Check the Entire Frame
Before moving on to caulking and painting, inspect the installed trim from different angles. Check for:
- Uneven reveal lines
- Gaps in the miter joints
- Raised nail heads
- Loose boards
- Trim that is not level
- Gaps between the wall and casing
- Cracks or damaged edges
Make necessary adjustments now. Caulk and paint can hide small imperfections, but they should not be used to cover major fitting or installation problems.
Step 9: Fill the Nail Holes
Use wood putty or filler to cover the nail holes, then let it dry according to the manufacturer’s instructions.
Once the filler has hardened, sand the area until it is smooth and flush with the surrounding trim. Wipe away all dust before applying primer or paint.
Step 10: Apply Paintable Caulk
Apply a thin bead of paintable caulk where the trim meets the wall, and use it to fill small gaps at the corners. Smooth the caulk with a damp finger or caulk tool, then wipe away any excess before it dries.
For most interior trim projects, acrylic or latex caulk is a suitable choice because it can be painted after it cures. Never apply caulk over damp, moldy, or damaged surfaces. Clean and dry the area first.
Step 11: Prime and Paint the Trim
If you are working with raw wood, apply a quality primer before painting. Primer seals the surface, reduces uneven absorption, and helps create a smoother finish.
Once the primer has dried, lightly sand the trim if necessary and remove the dust. Apply two thin, even coats of paint using a brush or small roller.
For clean, sharp edges, apply painter’s tape along the window frame and the wall before painting. Remove the tape while the final coat is still slightly wet to help prevent peeling.
Tips for Cleaner Window Trim Joints
Test-Fit Every Cut
Never assume a board will fit perfectly based only on your measurements. Hold every piece in place before applying glue or nails.
Sneak Up on Miter Cuts
Instead of cutting directly to the final mark, leave the board slightly long and remove small amounts until the joint fits.
Keep the Reveal Consistent
A consistent reveal is one of the easiest ways to make trim look professionally installed. Check it as you fasten each board.
Do Not Overuse Caulk
A small bead of caulk can hide a minor gap. Too much caulk creates a rounded, messy edge and may crack later.
Use the Correct Nail Length
Nails should pass through the trim and reach solid material behind the wall surface. The correct size depends on the thickness of the trim, drywall, and framing.
Exterior Window Trim: Important Moisture Protection
Exterior window trim requires more planning than interior casing. It must be installed as part of the window’s water-management system.
Properly installed flashing helps direct water away from the window opening and out of the wall assembly. Before installing exterior trim, check for:
- Damaged or missing flashing
- Gaps around the window
- Rotted wood
- Cracked sealant
- Missing drip cap
- Water stains inside the wall
- Peeling paint near the window
Exterior trim boards should be sealed or primed on all exposed and cut surfaces. Use exterior-grade fasteners and sealant suitable for the trim material.
If water is getting behind the siding or trim, replacing the boards without fixing the flashing will not solve the problem.
Common Mistakes to Avoid
Assuming Every Window Is Square
Window openings can vary, especially in older homes. Measure and test-fit every board.
Cutting All the Boards at Once
A small error in the first measurement can affect the entire project. Cut one piece at a time.
Using Drywall as the Only Support
Trim fastened only to drywall may become loose. Locate studs, headers, or other solid framing.
Nailing Too Close to the Edge
Fastening near the end of a board can cause splitting. Keep nails away from the edges and use the correct fastener size.
Skipping Wood Glue
Glue helps keep miter joints together. Use a small amount and clean away excess before it dries.
Painting Before the Caulk Dries
Allow putty and caulk to dry completely before priming or painting. Painting too soon can leave soft spots, cracks, or visible marks.
Covering Up Moisture Damage
Rot, mold, and water stains are signs that the window or wall may have a larger problem. Repair the cause before installing new trim.
When to Hire a Professional
Installing trim around one standard window may be a manageable weekend project. However, professional help can be a better choice if:
- You do not have a miter saw or nail gun
- The window opening is badly uneven
- The trim is expensive or custom-made
- Several windows need to be completed
- The window has water damage
- The work requires an exterior ladder
- You want the project completed quickly
- You also need drywall repair or painting
A professional can measure the opening, recommend suitable materials, make accurate cuts, and complete the finishing work.
Looking for a Tallahassee Handyman Near You?
If you need help with window trim, casing, caulking, or minor carpentry repairs, hiring a local professional can save you time and materials.
When comparing local home repair services, explore handyman Tallahassee services and choose a professional with experience in window trim installation and general carpentry. Before hiring, ask about previous projects, available services, and whether they will inspect the window for moisture damage before starting the work.
If you are searching for a Tallahassee handyman near you, choose a contractor who can handle the full project, including preparation, installation, caulking, and painting.
For reliable home repairs, contact our team for professional handyman services in Tallahassee.
Final Thoughts
Window trim gives a room a finished appearance, but the best results come from careful preparation. Inspect the opening, seal gaps, mark the reveal, and test-fit every board before fastening it.
Take your time with the miter joints and finishing work. Small details such as smooth caulk lines, filled nail holes, and consistent reveals can make the difference between an average installation and a professional-looking result.
If the project feels larger than expected, a trusted handyman in Tallahassee can complete the work and take care of related repairs at the same time.
Professional Window Trim Installation in Tallahassee
Help with casing, miter joints, caulking, painting, and related carpentry repairs.